This tutorial has a ton of images in it.

In order to change the location that the assassination is to take place you need to edit two files hitman_sr2_city.cts and
hitman_sr2_city.xtbl.
First let's look at hitman_sr2_city.xtbl
Original
Modded
For this part of the tutorial we will concentrate on changing the location name
and area. So we need first to change the location information
(Original)
The original entry has the activity located at the abandoned drive in
The <Start_Location>hitman_sr2_city_br_start</Start_Location>
refers to the location where you receive the phone call that unlocks the
Barrio instance of the Hitman activity.
In order to mod the location we have to define the new location
(modded)
We do this by changing the Defined Region line.
The defined region line ties into the hitman_sr2_city.cts file
which we will change next but first we need to change one more thing
(Original)
(Modded)
We have to change the Name line with the name of out new area.
The first name change was located in the location section, this one is located in the
trigger section. once these values are changed then you can save your file
Now we are ready to look at the hitman_sr2_city.cts file.
(Original)
In the original entries the lcation names are defined as
...drive-in...
Example:
"hitman_sr2_city_br_drive_in_center"
In the replaced entries they are defined as
...Pirate_ship_cove...
Example:
"hitman_sr2_pirate_ship_cove_01"
Of course when you change your locations you'll name your areas to suit you.
Once you get your areas renamed you will substitute the proper
coordinates and Orientation information.
Once you have everything changed make sure that you have your brackets added
and your periods and dashes in all the right places and save your file.
Then drop both files in you r mods directory and recompile your patch.
Note: If you change the target order then your custom location data might
be ignored. For instance we set Alvan on the sunken pirate ship but after
I changed his order in the hit list then it changed the location of hit to marina.


Original
Modded
Changing The Money, Respect and Health Points (HP) is
straight forward, just change the appropriate numbers

Original
Modded
<Targets>[/CODES]
Bodyguards can be added, removed or changed.

Original
Modded
Just use the name of the npc you want to use.
You can also remove bodyguards. by just deleting the whole
section.
You can add bodyguards by adding the section to an entry as well.
You can also add and subtract the number of bodyguards. The limit seems to be three.
The Decoy chances are 0 or 1. 0 is no decoy and 1 is There will be a decoy deployed.
You can also use a number between the two for random chances IE: 0.5, etc...
The Hitman chances are 0 or 1. 0 is no Hitman and 1 is There will be a Hitman deployed.
You can also use a number between the two for random chances IE: 0.5, etc...


The targets are in the orders that they appear in the
hitman_sr2_city.xtbl. In the original file Alvan was the
first entry. And Chris was the third name on
the third list. I have changed their places by cutting
and pasting the entries.


Original
Modded
The problem with changing the NPC model seems to
be caused by the models that I was trying to use.
I'm not sure why but trying to use models like Pierce, or Donnie or Anna,
in fact every main story character that I tried refused to load. However changing
the NPC to a generic character like npc_pimp or npc_streaker loaded just fine.
***ADDENDUM 04/23/2025*** This addendum is countrsy of -SeaBoundSaint-
To change the target to NPCs like Maero, Donnie, Anna, Jyunichim wtc,,,
you need to change a line in their _des file (npc_Anna_des.etc..)
(Original)
(Modded)
Just change the <StreamCategory>Non Ambiently Spawnable</StreamCategory> line to
<StreamCategory>Spawnable Civilian</StreamCategory>
When you decide which NPC model to swap in, all you have to do is change the
<Character>npc_streaker</Character> line
You can change the text that appears on the Target's dossier by editing the
<Dossier> line. Which will save you from having to edit the strings file but the trade off is
that you have a very limited mount of space, Where as if you edit the strings file then you
should have plenty of space
<Dossier>HITMAN_TARGET_1_1</Dossier> This line points to the prewritten mission text in the
strings file.
<Dossier>This one is for Johnny!</Dossier> This is the edited line that will be printed
on the dossier.


Open the npc file for your target (in this case npc_target01.xtbl) scroll down the file and make note of the clothes
that the target is wearing.
There are two sets of entries that you need to look at. The first set shows which clothes the
target is wearing. The second set is the one that you edit.
Just change the color values then use the npc cruncher to crunch the edited file.
As part of -Seabound Saints-'s NPC Editing - A Comprehensive Guide there is a
zip file that will make the crunching easier. It is the NPC Cruncher Stuff Zip File.
I am including the files for the rewritten first activity instance for you to study. If you decide to try it out:
Just go to the Barrio activity location. The judge will be the first name on the list. (The Hitman Judge Mission Zip File)
In order to change the location that the assassination is to take place you need to edit two files hitman_sr2_city.cts and
hitman_sr2_city.xtbl.
First let's look at hitman_sr2_city.xtbl
Original
Code:
<Hitman>
        <Name>hitman_sr2_city_br</Name>
        <_Editor>
            <Category>Entries</Category>
            </_Editor>
        <Start_Location>hitman_sr2_city_br_start</Start_Location>
        <Targets>
            <Target>
                <Name>Alvan</Name>
                <Character>npc_target01</Character>
                <Respect_Reward>200</Respect_Reward>
                <Cash_Reward>500</Cash_Reward>
                <HP>1500</HP>
                <Spawn_Locations>
                    <Location>
                        <Defined_Region>Abandoned Drive-In</Defined_Region>
                        </Location>
                    </Spawn_Locations>
                <Temporary_Spawn_Triggers>
                    <Trigger>
                        <Use_Drink></Use_Drink>
                        </Trigger>
                    <Trigger>
                        <Use_Drink></Use_Drink>
                        </Trigger>
                    <Trigger>
                        <Time_In_Region>
                            <Name>Abandoned Drive-In</Name>
                            <Time>10</Time>
                            </Time_In_Region>
                        </Trigger>
                    </Temporary_Spawn_Triggers>
                <Weapon>beretta</Weapon>
                <Dossier>HITMAN_TARGET_1_1</Dossier>
                <Decoy_Chance>0.0</Decoy_Chance>
                <Rival_Hitman_Chance>0.1</Rival_Hitman_Chance>
                <Specific_Location>HITMAN_LOC_1_1</Specific_Location>
                </Target>
            <Target>
Code:
<Hitman>
        <Name>hitman_sr2_city_br</Name>
        <_Editor>
            <Category>Entries</Category>
            </_Editor>
        <Start_Location>hitman_sr2_city_br_start</Start_Location>
        <Targets>
            <Target>
                <Name>Alvan</Name>
                <Character>npc_target01</Character>
                <Respect_Reward>200</Respect_Reward>
                <Cash_Reward>500</Cash_Reward>
                <HP>1500</HP>
                <Spawn_Locations>
                    <Location>
                        <Defined_Region>Pirate Ship Cove</Defined_Region>
                        </Location>
                    </Spawn_Locations>
                <Temporary_Spawn_Triggers>
                    <Trigger>
                        <Time_In_Region>
                            <Name>Pirate Ship Cove</Name>
                            <Time>10</Time>
                            </Time_In_Region>
                        </Trigger>
                    </Temporary_Spawn_Triggers>
                <Weapon>beretta</Weapon>
                <Dossier>HITMAN_TARGET_1_1</Dossier>
                <Decoy_Chance>0.0</Decoy_Chance>
                <Rival_Hitman_Chance>0.0</Rival_Hitman_Chance>
                <Specific_Location>Pirate Ship Cove</Specific_Location>
                </Target>
For this part of the tutorial we will concentrate on changing the location name
and area. So we need first to change the location information
(Original)
Code:
     <Spawn_Locations>
                    <Location>
                        <Defined_Region>Abandoned Drive-In</Defined_Region>
                        </Location>
                    </Spawn_Locations>
The original entry has the activity located at the abandoned drive in
The <Start_Location>hitman_sr2_city_br_start</Start_Location>
refers to the location where you receive the phone call that unlocks the
Barrio instance of the Hitman activity.
In order to mod the location we have to define the new location
(modded)
Code:
  <Spawn_Locations>
                    <Location>
                        <Defined_Region>Pirate Ship Cove</Defined_Region>
                        </Location>
                    </Spawn_Locations>
We do this by changing the Defined Region line.
The defined region line ties into the hitman_sr2_city.cts file
which we will change next but first we need to change one more thing
(Original)
Code:
  <Trigger>
                        <Time_In_Region>
                            <Name>Abandoned Drive-In</Name>
                            <Time>10</Time>
                            </Time_In_Region>
                        </Trigger>
Code:
                    <Trigger>
                        <Time_In_Region>
                            <Name>Pirate Ship Cove</Name>
                            <Time>10</Time>
                            </Time_In_Region>
                        </Trigger>
We have to change the Name line with the name of out new area.
The first name change was located in the location section, this one is located in the
trigger section. once these values are changed then you can save your file
Now we are ready to look at the hitman_sr2_city.cts file.
(Original)
Code:
$Navpoint:    "hitman_sr2_city_br_drive_in_center"
$Type:        "ground"
$Pos:            <1239.844727 9.252465 -589.652710>
$Orient:        [I]

$Navpoint:    "hitman_sr2_city_br_drive_in_01"
$Type:        "ground"
$Pos:            <1223.568359 9.219892 -556.461670>
$Orient:        [I]

$Navpoint:    "hitman_sr2_city_br_drive_in_02"
$Type:        "ground"
$Pos:            <1281.571167 9.358432 -570.515381>
$Orient:        [I]

$Navpoint:    "hitman_sr2_city_br_drive_in_03"
$Type:        "ground"
$Pos:            <1253.173218 8.919209 -640.248474>
$Orient:        [I]

$Navpoint:    "hitman_sr2_city_br_drive_in_04"
$Type:        "ground"
$Pos:            <1207.898071 9.264498 -618.251160>
$Orient:        [I]

$Navpoint:    "hitman_sr2_city_br_Alvan_in_01"
$Type:        "ground"
$Pos:            <1236.477051 13.630943 -622.586548>
$Orient:        [-1.204182]

$Navpoint:    "hitman_sr2_city_br_Alvan_in_02"
$Type:        "ground"
$Pos:            <1250.792725 29.289093 -556.167175>
$Orient:        [-2.924886]
Code:
$Navpoint:    "hitman_sr2_city_br_Alvan_near_01"
$Type:        "ground"
$Pos:            <1271.768188 9.408655 -562.801392>
$Orient:        [I]

$Navpoint:    "hitman_sr2_city_br_Alvan_near_02"
$Type:        "ground"
$Pos:            <1243.098389 9.060000 -617.253235>
$Orient:        [I]]/Code]
(Modded)
[Code}
$Navpoint:    "hitman_sr2_city_oirate_ship_cove_center"
$Type:        "ground"
$Pos:            <3981.074463 -4.685581 -157.636734>
$Orient:        [I]

$Navpoint:    "hitman_sr2_city_pirate_ship_cove_01"
$Type:        "ground"
$Pos:            <3984.72 -4.186 -158.256>
$Orient:        [I]

$Navpoint:    "hitman_sr2_city_pirate_ship_cove_02"
$Type:        "ground"
$Pos:            <3960.46 -5.29 -164.73>
$Orient:        [I]

$Navpoint:    "hitman_sr2_city_pirate_ship_cove_03"
$Type:        "ground"
$Pos:            <3959.58 -5.88 -161.68>
$Orient:        [I]

$Navpoint:    "hitman_sr2_pirate_ship_cove_04"
$Type:        "ground"
$Pos:            <3994.31 0.09 -158.34>
$Orient:        [I]

$Navpoint:    "hitman_sr2_city_br_Alvan_in_01"
$Type:        "ground"
$Pos:            <3993.53 -0.73 -153.55>
$Orient:        [-1.204182]

$Navpoint:    "hitman_sr2_city_br_Alvan_in_02"
$Type:        "ground"
$Pos:            <3993.53 -0.73 -154.55>
$Orient:        [-2.924886][/Cpde]
[Code]
$Navpoint:    "hitman_sr2_city_br_Alvan_near_01"
$Type:        "ground"
$Pos:            <1271.768188 9.408655 -562.801392>
$Orient:        [I]

$Navpoint:    "hitman_sr2_city_br_Alvan_near_02"
$Type:        "ground"
$Pos:            <1243.098389 9.060000 -617.253235>
$Orient:        [I]
In the original entries the lcation names are defined as
...drive-in...
Example:
"hitman_sr2_city_br_drive_in_center"
In the replaced entries they are defined as
...Pirate_ship_cove...
Example:
"hitman_sr2_pirate_ship_cove_01"
Of course when you change your locations you'll name your areas to suit you.
Once you get your areas renamed you will substitute the proper
coordinates and Orientation information.
Once you have everything changed make sure that you have your brackets added
and your periods and dashes in all the right places and save your file.
Then drop both files in you r mods directory and recompile your patch.
Note: If you change the target order then your custom location data might
be ignored. For instance we set Alvan on the sunken pirate ship but after
I changed his order in the hit list then it changed the location of hit to marina.
Original
Code:
                <Name>Alvan</Name>
                <Character>npc_target01</Character>
                <Respect_Reward>200</Respect_Reward>
                <Cash_Reward>500</Cash_Reward>
                <HP>1500</HP>
Code:
                 <Name>Alvan</Name>
                <Character>npc_target01</Character>
                <Respect_Reward>60000</Respect_Reward>
                <Cash_Reward>20000</Cash_Reward>
                <HP>50</HP>
Changing The Money, Respect and Health Points (HP) is
straight forward, just change the appropriate numbers
Original
Code:
            <Target>
                <Name>Greg</Name>
                <Character>npc_target30</Character>
                <HP>3000</HP>
                <Weapon>pump_action_shotgun</Weapon>
                <Cash_Reward>3000</Cash_Reward>
                <Respect_Reward>1000</Respect_Reward>
                <Spawn_Locations>
                    <Location>
                        <Defined_Region>Freckle Bitches 01</Defined_Region>
                        </Location>
                    <Location>
                        <Defined_Region>Freckle Bitches 02</Defined_Region>
                        </Location>
                    <Location>
                        <Defined_Region>Freckle Bitches 03</Defined_Region>
                        </Location>
                    <Location>
                        <Defined_Region>Freckle Bitches 04</Defined_Region>
                        </Location>
                    </Spawn_Locations>
                <Bodyguards>
                    <Bodyguard>
                        <Character>npc_cop</Character>
                        <Weapon>beretta</Weapon>
                        </Bodyguard>
                    <Bodyguard>
                        <Character>npc_cop</Character>
                        <Weapon>beretta</Weapon>
                        </Bodyguard>
                    </Bodyguards>
                <Dossier>HITMAN_TARGET_4_6</Dossier>
                <Permanent_Spawn_Flags>
                    <Flag>
                        <Purchased_Food_From_FB>chicken_bazooms</Purchased_Food_From_FB>
                        </Flag>
                    <Flag>
                        <Purchased_Food_From_FB>the_fist</Purchased_Food_From_FB>
                        </Flag>
                    <Flag>
                        <Purchased_Food_From_FB>large_softdrink</Purchased_Food_From_FB>
                        </Flag>
                    <Flag>
                        <Purchased_Food_From_FB>burgera</Purchased_Food_From_FB>
                        </Flag>
                    </Permanent_Spawn_Flags>
                <Decoy_Chance>0.1</Decoy_Chance>
                <Rival_Hitman_Chance>0.75</Rival_Hitman_Chance>
                <Specific_Location>HITMAN_LOC_4_6</Specific_Location>
                </Target>
            </Targets>
        <Display_Name>HITMAN_TRAILER_PARK</Display_Name>
        <Location_Index>4</Location_Index>
        <Force_Spawn_Delay>300</Force_Spawn_Delay>
        <Defined_Regions>
            <Defined_Region>
                <Name>Freckle Bitches 01</Name>
                <Center_Point>hitman_sr2_city_tp_fb1_center</Center_Point>
                <Boundary_Points>
                    <Boundary_Point>
                        <Name>hitman_sr2_city_tp_fb1_01</Name>
                        </Boundary_Point>
                    <Boundary_Point>
                        <Name>hitman_sr2_city_tp_fb1_02</Name>
                        </Boundary_Point>
                    <Boundary_Point>
                        <Name>hitman_sr2_city_tp_fb1_03</Name>
                        </Boundary_Point>
                    <Boundary_Point>
                        <Name>hitman_sr2_city_tp_fb1_04</Name>
                        </Boundary_Point>
                    </Boundary_Points>
                </Defined_Region>
            <Defined_Region>
                <Name>Freckle Bitches 02</Name>
                <Center_Point>hitman_sr2_city_tp_fb2_center</Center_Point>
                <Boundary_Points>
                    <Boundary_Point>
                        <Name>hitman_sr2_city_tp_fb2_01</Name>
                        </Boundary_Point>
                    <Boundary_Point>
                        <Name>hitman_sr2_city_tp_fb2_02</Name>
                        </Boundary_Point>
                    <Boundary_Point>
                        <Name>hitman_sr2_city_tp_fb2_03</Name>
                        </Boundary_Point>
                    <Boundary_Point>
                        <Name>hitman_sr2_city_tp_fb2_04</Name>
                        </Boundary_Point>
                    </Boundary_Points>
                </Defined_Region>
            <Defined_Region>
                <Name>Freckle Bitches 03</Name>
                <Center_Point>hitman_sr2_city_tp_fb3_center</Center_Point>
                <Boundary_Points>
                    <Boundary_Point>
                        <Name>hitman_sr2_city_tp_fb3_01</Name>
                        </Boundary_Point>
                    <Boundary_Point>
                        <Name>hitman_sr2_city_tp_fb3_02</Name>
                        </Boundary_Point>
                    <Boundary_Point>
                        <Name>hitman_sr2_city_tp_fb3_03</Name>
                        </Boundary_Point>
                    <Boundary_Point>
                        <Name>hitman_sr2_city_tp_fb3_04</Name>
                        </Boundary_Point>
                    </Boundary_Points>
                </Defined_Region>
            <Defined_Region>
                <Name>Freckle Bitches 04</Name>
                <Center_Point>hitman_sr2_city_tp_fb4_center</Center_Point>
                <Boundary_Points>
                    <Boundary_Point>
                        <Name>hitman_sr2_city_tp_fb4_01</Name>
                        </Boundary_Point>
                    <Boundary_Point>
                        <Name>hitman_sr2_city_tp_fb4_02</Name>
                        </Boundary_Point>
                    <Boundary_Point>
                        <Name>hitman_sr2_city_tp_fb4_03</Name>
                        </Boundary_Point>
                    <Boundary_Point>
                        <Name>hitman_sr2_city_tp_fb4_04</Name>
                        </Boundary_Point>
                    </Boundary_Points>
                </Defined_Region>
            </Defined_Regions>
        <Unlock_Conversation_ID>HITMAN_PHONECALL_02</Unlock_Conversation_ID>
        </Hitman>
    <Hitman>
        <Name>hitman_sr2_city_sr</Name>
        <_Editor>
            <Category>Entries</Category>
            </_Editor>
        <Start_Location>hitman_sr2_city_sr_start</Start_Location>
        <Targets>
Code:
<Target>
                <Name>Greg</Name>
                <Character>npc_target30</Character>
                <HP>3000</HP>
                <Weapon>pump_action_shotgun</Weapon>
                <Cash_Reward>3000</Cash_Reward>
                <Respect_Reward>1000</Respect_Reward>
                <Spawn_Locations>
                    <Location>
                        <Defined_Region>Freckle Bitches 01</Defined_Region>
                        </Location>
                    <Location>
                        <Defined_Region>Freckle Bitches 02</Defined_Region>
                        </Location>
                    <Location>
                        <Defined_Region>Freckle Bitches 03</Defined_Region>
                        </Location>
                    <Location>
                        <Defined_Region>Freckle Bitches 04</Defined_Region>
                        </Location>
                    </Spawn_Locations>
                <Bodyguards>
                    <Bodyguard>
                        <Character>npc_cop</Character>
                        <Weapon>beretta</Weapon>
                        </Bodyguard>
                    <Bodyguard>
                        <Character>npc_pimp</Character>
                        <Weapon>beretta</Weapon>
                        </Bodyguard>
                    </Bodyguards>
                <Dossier>HITMAN_TARGET_4_6</Dossier>
                <Permanent_Spawn_Flags>
                    <Flag>
                        <Purchased_Food_From_FB>chicken_bazooms</Purchased_Food_From_FB>
                        </Flag>
                    <Flag>
                        <Purchased_Food_From_FB>the_fist</Purchased_Food_From_FB>
                        </Flag>
                    <Flag>
                        <Purchased_Food_From_FB>large_softdrink</Purchased_Food_From_FB>
                        </Flag>
                    <Flag>
                        <Purchased_Food_From_FB>burgera</Purchased_Food_From_FB>
                        </Flag>
                    </Permanent_Spawn_Flags>
                <Decoy_Chance>0.1</Decoy_Chance>
                <Rival_Hitman_Chance>0.75</Rival_Hitman_Chance>
                <Specific_Location>HITMAN_LOC_4_6</Specific_Location>
                </Target>
            </Targets>
        <Display_Name>HITMAN_TRAILER_PARK</Display_Name>
        <Location_Index>4</Location_Index>
        <Force_Spawn_Delay>300</Force_Spawn_Delay>
        <Defined_Regions>
            <Defined_Region>
                <Name>Freckle Bitches 01</Name>
                <Center_Point>hitman_sr2_city_tp_fb1_center</Center_Point>
                <Boundary_Points>
                    <Boundary_Point>
                        <Name>hitman_sr2_city_tp_fb1_01</Name>
                        </Boundary_Point>
                    <Boundary_Point>
                        <Name>hitman_sr2_city_tp_fb1_02</Name>
                        </Boundary_Point>
                    <Boundary_Point>
                        <Name>hitman_sr2_city_tp_fb1_03</Name>
                        </Boundary_Point>
                    <Boundary_Point>
                        <Name>hitman_sr2_city_tp_fb1_04</Name>
                        </Boundary_Point>
                    </Boundary_Points>
                </Defined_Region>
            <Defined_Region>
                <Name>Freckle Bitches 02</Name>
                <Center_Point>hitman_sr2_city_tp_fb2_center</Center_Point>
                <Boundary_Points>
                    <Boundary_Point>
                        <Name>hitman_sr2_city_tp_fb2_01</Name>
                        </Boundary_Point>
                    <Boundary_Point>
                        <Name>hitman_sr2_city_tp_fb2_02</Name>
                        </Boundary_Point>
                    <Boundary_Point>
                        <Name>hitman_sr2_city_tp_fb2_03</Name>
                        </Boundary_Point>
                    <Boundary_Point>
                        <Name>hitman_sr2_city_tp_fb2_04</Name>
                        </Boundary_Point>
                    </Boundary_Points>
                </Defined_Region>
            <Defined_Region>
                <Name>Freckle Bitches 03</Name>
                <Center_Point>hitman_sr2_city_tp_fb3_center</Center_Point>
                <Boundary_Points>
                    <Boundary_Point>
                        <Name>hitman_sr2_city_tp_fb3_01</Name>
                        </Boundary_Point>
                    <Boundary_Point>
                        <Name>hitman_sr2_city_tp_fb3_02</Name>
                        </Boundary_Point>
                    <Boundary_Point>
                        <Name>hitman_sr2_city_tp_fb3_03</Name>
                        </Boundary_Point>
                    <Boundary_Point>
                        <Name>hitman_sr2_city_tp_fb3_04</Name>
                        </Boundary_Point>
                    </Boundary_Points>
                </Defined_Region>
            <Defined_Region>
                <Name>Freckle Bitches 04</Name>
                <Center_Point>hitman_sr2_city_tp_fb4_center</Center_Point>
                <Boundary_Points>
                    <Boundary_Point>
                        <Name>hitman_sr2_city_tp_fb4_01</Name>
                        </Boundary_Point>
                    <Boundary_Point>
                        <Name>hitman_sr2_city_tp_fb4_02</Name>
                        </Boundary_Point>
                    <Boundary_Point>
                        <Name>hitman_sr2_city_tp_fb4_03</Name>
                        </Boundary_Point>
                    <Boundary_Point>
                        <Name>hitman_sr2_city_tp_fb4_04</Name>
                        </Boundary_Point>
                    </Boundary_Points>
                </Defined_Region>
            </Defined_Regions>
        <Unlock_Conversation_ID>HITMAN_PHONECALL_02</Unlock_Conversation_ID>
        </Hitman>
    <Hitman>
        <Name>hitman_sr2_city_sr</Name>
        <_Editor>
            <Category>Entries</Category>
            </_Editor>
<Start_Location>hitman_sr2_city_sr_start</Start_Location>Bodyguards can be added, removed or changed.
Original
Code:
         <Bodyguards>
                    <Bodyguard>
                        <Character>npc_cop</Character>
                        <Weapon>beretta</Weapon>
                        </Bodyguard>
                    <Bodyguard>
                        <Character>npc_cop</Character>
                        <Weapon>beretta</Weapon>
                        </Bodyguard>
                    </Bodyguards>
Code:
         <Bodyguards>
                    <Bodyguard>
                        <Character>npc_cop</Character>
                        <Weapon>beretta</Weapon>
                        </Bodyguard>
                    <Bodyguard>
                        <Character>npc_pimp</Character>
                        <Weapon>beretta</Weapon>
                        </Bodyguard>
                        </Bodyguards>
Just use the name of the npc you want to use.
You can also remove bodyguards. by just deleting the whole
Code:
         <Bodyguards>
                    <Bodyguard>
                        <Character>npc_cop</Character>
                        <Weapon>beretta</Weapon>
                        </Bodyguard>
                    <Bodyguard>
                        <Character>npc_pimp</Character>
                        <Weapon>beretta</Weapon>
                        </Bodyguard>
</Bodyguards>You can add bodyguards by adding the section to an entry as well.
You can also add and subtract the number of bodyguards. The limit seems to be three.
Original
Modded
Modded
You can change the weapon just by altering the Weapon line.
To remove the weapon just delete the line completely.
Code:
<Target>
                <Name>Chris</Name>
                <Character>npc_target10</Character>
                <HP>2250</HP>
                <Weapon>beretta</Weapon>
                <Cash_Reward>2000</Cash_Reward>
                <Respect_Reward>600</Respect_Reward>
Code:
                <Name>Chris</Name>
                <Character>npc_target15</Character>
                <HP>50</HP>
                <Weapon>stun_gun</Weapon>
                <Cash_Reward>20000</Cash_Reward>
                <Respect_Reward>40000</Respect_Reward>
Code:
                <Name>Chris</Name>
                <Character>npc_target15</Character>
                <HP>50</HP>
                <Cash_Reward>20000</Cash_Reward>
                <Respect_Reward>40000</Respect_Reward>
You can change the weapon just by altering the Weapon line.
To remove the weapon just delete the line completely.
Code:
<Target>
                <Name>Chris</Name>
                <Character>npc_target15</Character>
                <HP>50</HP>
                <Weapon>stun_gun</Weapon>
                <Cash_Reward>20000</Cash_Reward>
                <Respect_Reward>40000</Respect_Reward>
                <Vehicle>bike_standard01</Vehicle>
                <Spawn_Locations>
                    <Location>
                        <District>Arena</District>
                        </Location>
                    <Location>
                        <District>Projects</District>
                        </Location>
                    <Location>
                        <District>Red Light</District>
                        </Location>
                    </Spawn_Locations>
                <Spawn_Conditions>
                    <Condition>
                       <Wearing_Customization_Item>men's tank top 1</Wearing_Customization_Item>
                        </Condition>
                    </Spawn_Conditions>
                <Dossier>HITMAN_TARGET_3_3</Dossier>
                <Decoy_Chance>0.1</Decoy_Chance>
                <Rival_Hitman_Chance>0.1</Rival_Hitman_Chance>
                <Specific_Location>HITMAN_LOC_3_3</Specific_Location>
The Decoy chances are 0 or 1. 0 is no decoy and 1 is There will be a decoy deployed.
You can also use a number between the two for random chances IE: 0.5, etc...
Code:
<Target>
                <Name>Chris</Name>
                <Character>npc_target15</Character>
                <HP>50</HP>
                <Weapon>stun_gun</Weapon>
                <Cash_Reward>20000</Cash_Reward>
                <Respect_Reward>40000</Respect_Reward>
                <Vehicle>bike_standard01</Vehicle>
                <Spawn_Locations>
                    <Location>
                        <District>Arena</District>
                        </Location>
                    <Location>
                        <District>Projects</District>
                        </Location>
                    <Location>
                        <District>Red Light</District>
                        </Location>
                    </Spawn_Locations>
                <Spawn_Conditions>
                    <Condition>
                       <Wearing_Customization_Item>men's tank top 1</Wearing_Customization_Item>
                        </Condition>
                    </Spawn_Conditions>
                <Dossier>HITMAN_TARGET_3_3</Dossier>
                <Decoy_Chance>0.1</Decoy_Chance>
                <Rival_Hitman_Chance>0.1</Rival_Hitman_Chance>
                <Specific_Location>HITMAN_LOC_3_3</Specific_Location>
The Hitman chances are 0 or 1. 0 is no Hitman and 1 is There will be a Hitman deployed.
You can also use a number between the two for random chances IE: 0.5, etc...
Original
Modded
To remove a trigger just delete the section. For instance remove the
drink trigger but leave the Temporary Spawn Triggers lines alone.
Original
Modded

You can add conditions that have to be met before the target will show up.
There is a difference between triggers and conditions, Triggers have to be pulled.
IE: You have to drink a 40oz. Conditions: A Condition has to be met IE: You are
wearing a certain piece of clothing.
In this case the on motorcycle condition was removed and the wearing undershirt
condition was added.
Code:
<Target>
                <Name>Mitri</Name>
                <Character>npc_target17</Character>
                <HP>2500</HP>
                <Weapon>beretta</Weapon>
                <Cash_Reward>2500</Cash_Reward>
                <Respect_Reward>800</Respect_Reward>
                <Spawn_Locations>
                    <Location>
                        <District>Factories</District>
                        </Location>
                    <Location>
                        <District>Docks And Warehouses</District>
                        </Location>
                    </Spawn_Locations>
                <Temporary_Spawn_Triggers>
                    <Trigger>
                        <Use_Drink></Use_Drink>
                        </Trigger>
                    </Temporary_Spawn_Triggers>
                <Bodyguards>
                    <Bodyguard>
                        <Character>npc_athlete_male</Character>
                        <Weapon>tec9</Weapon>
                        </Bodyguard>
                    </Bodyguards>
                <Dossier>HITMAN_TARGET_3_5</Dossier>
                <Decoy_Chance>0.3</Decoy_Chance>
                <Rival_Hitman_Chance>0.0</Rival_Hitman_Chance>
                <Specific_Location>HITMAN_LOC_3_5</Specific_Location>
                </Target>
Code:
<Target>
                <Name>Mitri</Name>
                <Character>npc_target17</Character>
                <HP>2500</HP>
                <Weapon>beretta</Weapon>
                <Cash_Reward>2500</Cash_Reward>
                <Respect_Reward>800</Respect_Reward>
                <Spawn_Locations>
                    <Location>
                        <District>Factories</District>
                        </Location>
                    <Location>
                        <District>Docks And Warehouses</District>
                        </Location>
                    </Spawn_Locations>
                <Temporary_Spawn_Triggers>
                    </Temporary_Spawn_Triggers>
                <Bodyguards>
                    <Bodyguard>
                        <Character>npc_athlete_male</Character>
                        <Weapon>tec9</Weapon>
                        </Bodyguard>
                    </Bodyguards>
                <Dossier>HITMAN_TARGET_3_5</Dossier>
                <Decoy_Chance>0.3</Decoy_Chance>
                <Rival_Hitman_Chance>0.0</Rival_Hitman_Chance>
                <Specific_Location>HITMAN_LOC_3_5</Specific_Location>
                </Target>
To remove a trigger just delete the section. For instance remove the
drink trigger but leave the Temporary Spawn Triggers lines alone.
Original
Code:
            <Target>
                <Name>Chris</Name>
                <Character>npc_target15</Character>
                <HP>2000</HP>
                <Weapon>beretta</Weapon>
                <Cash_Reward>1500</Cash_Reward>
                <Respect_Reward>400</Respect_Reward>
                <Vehicle>bike_standard01</Vehicle>
                <Spawn_Locations>
                    <Location>
                        <District>Arena</District>
                        </Location>
                    <Location>
                        <District>Projects</District>
                        </Location>
                    <Location>
                        <District>Red Light</District>
                        </Location>
                    </Spawn_Locations>
                <Spawn_Conditions>
                    <Condition>
                        <On_Motorcycle></On_Motorcycle>
                        </Condition>
                    </Spawn_Conditions>
                <Dossier>HITMAN_TARGET_3_3</Dossier>
                <Decoy_Chance>0.1</Decoy_Chance>
                <Rival_Hitman_Chance>0.1</Rival_Hitman_Chance>
                <Specific_Location>HITMAN_LOC_3_3</Specific_Location>
                </Target>
Code:
<Target>
                <Name>Chris</Name>
                <Character>npc_target15</Character>
                <HP>50</HP>
                <Weapon>stun_gun</Weapon>
                <Cash_Reward>20000</Cash_Reward>
                <Respect_Reward>40000</Respect_Reward>
                <Vehicle>bike_standard01</Vehicle>
                <Spawn_Locations>
                    <Location>
                        <District>Arena</District>
                        </Location>
                    <Location>
                        <District>Projects</District>
                        </Location>
                    <Location>
                        <District>Red Light</District>
                        </Location>
                    </Spawn_Locations>
                <Spawn_Conditions>
                    <Condition>
                       <Wearing_Customization_Item>men's tank top 1</Wearing_Customization_Item>
                        </Condition>
                    </Spawn_Conditions>
                <Dossier>HITMAN_TARGET_3_3</Dossier>
                <Decoy_Chance>0.1</Decoy_Chance>
                <Rival_Hitman_Chance>0.1</Rival_Hitman_Chance>
                <Specific_Location>HITMAN_LOC_3_3</Specific_Location>
                </Target>
You can add conditions that have to be met before the target will show up.
There is a difference between triggers and conditions, Triggers have to be pulled.
IE: You have to drink a 40oz. Conditions: A Condition has to be met IE: You are
wearing a certain piece of clothing.
In this case the on motorcycle condition was removed and the wearing undershirt
condition was added.
The targets are in the orders that they appear in the
hitman_sr2_city.xtbl. In the original file Alvan was the
first entry. And Chris was the third name on
the third list. I have changed their places by cutting
and pasting the entries.
When it comes to changing around the photos for Alvan
and Chris there are eight files that need to be changed.
To do so we will need Masamaru's PegTool
The files that need to be changed are:

First you need to use the Pegtool to open all four sets of
files listed above and switch the files between the 1_1a and 3_3 folders renaming the files properly as you go.
The mdd files are head shots and the others are the big white
backgrounds.
You will find the peg file and the g.peg files in pegs.vpp_pc and chunks4.vpp_pc. They are not in the textures.vpp_pc
Once the files have been switched around repack them with the
Pegtool and drop then in your mod directory along with any other
modded files, then recompile, Drop the created files into your SR2
directory.
and Chris there are eight files that need to be changed.
To do so we will need Masamaru's PegTool
The files that need to be changed are:
First you need to use the Pegtool to open all four sets of
files listed above and switch the files between the 1_1a and 3_3 folders renaming the files properly as you go.
The mdd files are head shots and the others are the big white
backgrounds.
You will find the peg file and the g.peg files in pegs.vpp_pc and chunks4.vpp_pc. They are not in the textures.vpp_pc
Once the files have been switched around repack them with the
Pegtool and drop then in your mod directory along with any other
modded files, then recompile, Drop the created files into your SR2
directory.
Original
Code:
    <Hitman>
        <Name>hitman_sr2_city_br</Name>
        <_Editor>
            <Category>Entries</Category>
            </_Editor>
        <Start_Location>hitman_sr2_city_br_start</Start_Location>
        <Targets>
            <Target>
                <Name>Alvan</Name>
                <Character>npc_target01</Character>
                <Respect_Reward>200</Respect_Reward>
                <Cash_Reward>500</Cash_Reward>
                <HP>1500</HP>
                <Spawn_Locations>
                    <Location>
                        <Defined_Region>Pirate Ship Cove</Defined_Region>
                        </Location>
                    </Spawn_Locations>
                <Temporary_Spawn_Triggers>
                    <Trigger>
                        <Time_In_Region>
                            <Name>Pirate Ship Cove</Name>
                            <Time>10</Time>
                            </Time_In_Region>
                        </Trigger>
                    </Temporary_Spawn_Triggers>
                <Weapon>beretta</Weapon>
                <Dossier>HITMAN_TARGET_1_1</Dossier>
                <Decoy_Chance>0.0</Decoy_Chance>
                <Rival_Hitman_Chance>0.0</Rival_Hitman_Chance>
                <Specific_Location>Pirate Ship Cove</Specific_Location>
                </Target>
Code:
    <Hitman>
        <Name>hitman_sr2_city_br</Name>
        <_Editor>
            <Category>Entries</Category>
            </_Editor>
        <Start_Location>hitman_sr2_city_br_start</Start_Location>
        <Targets>
            <Target>
                <Name>Alvan</Name>
                <Character>npc_streaker</Character>
                <Respect_Reward>200</Respect_Reward>
                <Cash_Reward>500</Cash_Reward>
                <HP>1500</HP>
                <Spawn_Locations>
                    <Location>
                        <Defined_Region>Pirate Ship Cove</Defined_Region>
                        </Location>
                    </Spawn_Locations>
                <Temporary_Spawn_Triggers>
                    <Trigger>
                        <Time_In_Region>
                            <Name>Pirate Ship Cove</Name>
                            <Time>10</Time>
                            </Time_In_Region>
                        </Trigger>
                    </Temporary_Spawn_Triggers>
                <Weapon>beretta</Weapon>
                <Dossier>HITMAN_TARGET_1_1</Dossier>
                <Decoy_Chance>0.0</Decoy_Chance>
                <Rival_Hitman_Chance>0.0</Rival_Hitman_Chance>
                <Specific_Location>Pirate Ship Cove</Specific_Location>
</Target>be caused by the models that I was trying to use.
I'm not sure why but trying to use models like Pierce, or Donnie or Anna,
in fact every main story character that I tried refused to load. However changing
the NPC to a generic character like npc_pimp or npc_streaker loaded just fine.
***ADDENDUM 04/23/2025*** This addendum is countrsy of -SeaBoundSaint-
To change the target to NPCs like Maero, Donnie, Anna, Jyunichim wtc,,,
you need to change a line in their _des file (npc_Anna_des.etc..)
(Original)
Code:
<root>
  <Table>
    <Character>
        <Name>npc_Anna</Name>
        <StreamCategory>Non Ambiently Spawnable</StreamCategory>
    </Character>
  </Table>

<TableDescription source="character_design_desc.xml">
</TableDescription>

</root>
Code:
<root>
  <Table>
    <Character>
        <Name>npc_Anna</Name>
        <StreamCategory>Spawnable Civilian</StreamCategory>
    </Character>
  </Table>

<TableDescription source="character_design_desc.xml">
</TableDescription>

</root>
Just change the <StreamCategory>Non Ambiently Spawnable</StreamCategory> line to
<StreamCategory>Spawnable Civilian</StreamCategory>
When you decide which NPC model to swap in, all you have to do is change the
<Character>npc_streaker</Character> line
Code:
<Hitman>
        <Name>hitman_sr2_city_br</Name>
        <_Editor>
            <Category>Entries</Category>
            </_Editor>
        <Start_Location>hitman_sr2_city_br_start</Start_Location>
        <Targets>
            <Target>
                <Name>Judge</Name>
                <Character>npc_judge_female</Character>
                <Respect_Reward>10000</Respect_Reward>
                <Cash_Reward>0</Cash_Reward>
                <HP>1500</HP>
                <Spawn_Locations>
                    <Location>
                        <Defined_Region>Courthouse</Defined_Region>
                        </Location>
                    </Spawn_Locations>
                <Bodyguards>
                    <Bodyguard>
                        <Character>npc_cop</Character>
                        <Weapon>pump_action_shotgun</Weapon>
                        </Bodyguard>
                    <Bodyguard>
                        <Character>npc_cop</Character>
                        <Weapon>pump_action_shotgun</Weapon>
                        </Bodyguard>
                    </Bodyguards>
                <Weapon>pump_action_shotgun</Weapon>
                <Dossier>This one is for Johnny!</Dossier>
                <Decoy_Chance>0</Decoy_Chance>
                <Rival_Hitman_Chance>0</Rival_Hitman_Chance>
                <Specific_Location>The Courthouse</Specific_Location>
                </Target>
You can change the text that appears on the Target's dossier by editing the
<Dossier> line. Which will save you from having to edit the strings file but the trade off is
that you have a very limited mount of space, Where as if you edit the strings file then you
should have plenty of space
<Dossier>HITMAN_TARGET_1_1</Dossier> This line points to the prewritten mission text in the
strings file.
<Dossier>This one is for Johnny!</Dossier> This is the edited line that will be printed
on the dossier.
To change the name of the target you will need to edit both the hitman activity xtbl
and cts files because if you only edit one of them then your game will crash, if it
loads at all.
In the hitman xtbl you will need to edit two lines
Original
Modded
The name line is what you want to call your target and the
character line is the npc xtbl.
That is all it takes to change the name in the dossier ...
However if you don't want your game to crash then you will need
to edit the cts file as well.
(Original)
modded
You need to make sure that the name is the same in both files
to avoid crashes.
and cts files because if you only edit one of them then your game will crash, if it
loads at all.
In the hitman xtbl you will need to edit two lines
Original
Code:
                <Name>Alvan</Name>
                <Character>npc_target01</Character>
Code:
               <Name>Judge</Name>
                <Character>npc_judge_female</Character>
The name line is what you want to call your target and the
character line is the npc xtbl.
That is all it takes to change the name in the dossier ...
However if you don't want your game to crash then you will need
to edit the cts file as well.
(Original)
Code:
$Navpoint:    "hitman_sr2_city_br_drive_in_center"
$Type:        "ground"
$Pos:            <1239.844727 9.252465 -589.652710>
$Orient:        [I]

$Navpoint:    "hitman_sr2_city_br_drive_in_01"
$Type:        "ground"
$Pos:            <1223.568359 9.219892 -556.461670>
$Orient:        [I]

$Navpoint:    "hitman_sr2_city_br_drive_in_02"
$Type:        "ground"
$Pos:            <1281.571167 9.358432 -570.515381>
$Orient:        [I]

$Navpoint:    "hitman_sr2_city_br_drive_in_03"
$Type:        "ground"
$Pos:            <1253.173218 8.919209 -640.248474>
$Orient:        [I]

$Navpoint:    "hitman_sr2_city_br_drive_in_04"
$Type:        "ground"
$Pos:            <1207.898071 9.264498 -618.251160>
$Orient:        [I]

$Navpoint:    "hitman_sr2_city_br_Alvan_in_01"
$Type:        "ground"
$Pos:            <1236.477051 13.630943 -622.586548>
$Orient:        [-1.204182]

$Navpoint:    "hitman_sr2_city_br_Alvan_in_02"
$Type:        "ground"
$Pos:            <1250.792725 29.289093 -556.167175>
$Orient:        [-2.924886]
Code:
$Navpoint:    "hitman_sr2_city_br_courthouse_center"
$Type:        "ground"
$Pos:            <-632.138977 23.482016 -937.289551>
$Orient:        [I]

$Navpoint:    "hitman_sr2_city_br_courthouse_01"
$Type:        "ground"
$Pos:            <-631.565403 23.500124 -926.617798>
$Orient:        [I]

$Navpoint:    "hitman_sr2_city_br_courthouse_02"
$Type:        "ground"
$Pos:            <-627.098389 23.489379 -922.093445>
$Orient:        [I]

$Navpoint:    "hitman_sr2_city_br_courthouse_03"
$Type:        "ground"
$Pos:            <-638.573571 23.483278 -929.267334>
$Orient:        [I]

$Navpoint:    "hitman_sr2_city_br_courthouse_04"
$Type:        "ground"
$Pos:            <-631.487061 24.056890 -931.358887>
$Orient:        [I]

$Navpoint:    "hitman_sr2_city_br_Judge_in_01"
$Type:        "ground"
$Pos:            <-623.776917 23.864918 -930.910950>
$Orient:        [-1.204182]

$Navpoint:    "hitman_sr2_city_br_Judge_in_02"
$Type:        "ground"
$Pos:            <-623.787020 23.975019 -932.921060>
$Orient:        [-2.924886]
You need to make sure that the name is the same in both files
to avoid crashes.
Just grab a program like powertools and install it.
Turn on your scroll lock and you should see the coordinates in the top corner of your screen.

Travel to the site that you will use for the activity instance and write down some coordinates
You need about 7 sets of them for this mission. Then just replace the coordinates in the
cts file.
Remember to change the Navpoint names to suit the name that you have chosen
Turn on your scroll lock and you should see the coordinates in the top corner of your screen.
Travel to the site that you will use for the activity instance and write down some coordinates
You need about 7 sets of them for this mission. Then just replace the coordinates in the
cts file.
Remember to change the Navpoint names to suit the name that you have chosen
Code:
  <Location>
                        <Defined_Region>Courthouse</Defined_Region>
</Location>Open the npc file for your target (in this case npc_target01.xtbl) scroll down the file and make note of the clothes
that the target is wearing.
Code:
<root>
<Table>
<Mesh>
<Name>npc_target01</Name>
<Variants>
<Variant>
<Name>Alvin</Name>
<Weight>100.000</Weight>
<Character_Type>frat</Character_Type>
<Gender>Male</Gender>
<Race>Asian</Race>
<Variant_IDs>
<Vid_group>
<Name>body</Name>
<Vid_chances>
<Vid_chance>
<Description>body</Description>
<VID_list>1</VID_list>
<Chance>100.000</Chance>
</Vid_chance>
</Vid_chances>
</Vid_group>
<Vid_group>
<Name>head hair</Name>
<Vid_chances>
<Vid_chance>
<Description>male short parted left 1</Description>
<VID_list>5</VID_list>
<Chance>100.000</Chance>
</Vid_chance>
</Vid_chances>
</Vid_group>
<Vid_group>
<Name>eyebrows</Name>
<Vid_chances>
<Vid_chance>
<Description>male eyebrows 2</Description>
<VID_list>6</VID_list>
<Chance>100.000</Chance>
</Vid_chance>
</Vid_chances>
</Vid_group>
<Vid_group>
<Name>beard</Name>
<Vid_chances>
<Vid_chance>
<Description>goatee 17</Description>
<VID_list>7</VID_list>
<Chance>100.000</Chance>
</Vid_chance>
</Vid_chances>
</Vid_group>
<Vid_group>
<Name>eyes</Name>
<Vid_chances>
<Vid_chance>
<Description>human eyes</Description>
<VID_list>8</VID_list>
<Chance>100.000</Chance>
</Vid_chance>
</Vid_chances>
</Vid_group>
<Vid_group>
<Name>eyewear</Name>
<Vid_chances>
<Vid_chance>
<Description>Terminator Shades</Description>
<VID_list>9</VID_list>
<Chance>100.000</Chance>
</Vid_chance>
</Vid_chances>
</Vid_group>
<Vid_group>
<Name>bottoms</Name>
<Vid_chances>
<Vid_chance>
<Description>men's long loose cargo shorts 2</Description>
<VID_list>10</VID_list>
<Chance>100.000</Chance>
</Vid_chance>
</Vid_chances>
</Vid_group>
<Vid_group>
<Name>undershirt</Name>
<Vid_chances>
<Vid_chance>
<Description>basic T-shirt</Description>
<VID_list>12</VID_list>
<Chance>100.000</Chance>
</Vid_chance>
</Vid_chances>
</Vid_group>
<Vid_group>
<Name>shoes</Name>
<Vid_chances>
<Vid_chance>
<Description>double-strapped sandals</Description>
<VID_list>13</VID_list>
<Shoe_Heel_Height>0.009</Shoe_Heel_Height>
<Chance>100.000</Chance>
</Vid_chance>
</Vid_chances>
</Vid_group>
<Vid_group>
<Name>left wrist</Name>
<Vid_chances>
<Vid_chance>
<Description>men's nice watch 1 left</Description>
<VID_list>14</VID_list>
<Chance>100.000</Chance>
</Vid_chance>
</Vid_chances>
</Vid_group>
</Variant_IDs>
<Props></Props>
<Materials>
<Material_group>
<Name>body</Name>
<Material_chances>
<Material_chance>
<Name>skin_1</Name>
<Chance>100.000</Chance>
</Material_chance>
</Material_chances>
<Color_Scheme_Chances>
<Color_Scheme_Chance>
<Name>Unnamed</Name>
<Chance>100.000</Chance>
<Color_Values>
<Color_Value>
<Variable_Name>Pigment_Color</Variable_Name>
<Color>skin C1</Color>
</Color_Value>
<Color_Value>
<Variable_Name>Specular_Color</Variable_Name>
<Color>White</Color>
</Color_Value>
</Color_Values>
</Color_Scheme_Chance>
</Color_Scheme_Chances>
</Material_group>
<Material_group>
<Name>male short parted left 1</Name>
<Color_Group>hair</Color_Group>
<Material_chances>
<Material_chance>
<Name>parted hair_2</Name>
<Chance>100.000</Chance>
</Material_chance>
</Material_chances>
<Color_Scheme_Chances>
<Color_Scheme_Chance>
<Name>Unnamed</Name>
<Chance>100.000</Chance>
<Color_Values>
<Color_Value>
<Variable_Name>Primary_Gradient_Color_A</Variable_Name>
<Color>Black_1</Color>
</Color_Value>
<Color_Value>
<Variable_Name>Primary_Gradient_Color_B</Variable_Name>
<Color>Black_2</Color>
</Color_Value>
<Color_Value>
<Variable_Name>Primary_Gradient_Color_C</Variable_Name>
<Color>Black_3</Color>
</Color_Value>
<Color_Value>
<Variable_Name>Primary_Gradient_Color_D</Variable_Name>
<Color>Black_4</Color>
</Color_Value>
<Color_Value>
<Variable_Name>Specular_Color</Variable_Name>
<Color>Black_specular</Color>
</Color_Value>
<Color_Value>
<Variable_Name>Secondary_Gradient_Color_A</Variable_Name>
<Color>Black_1</Color>
</Color_Value>
<Color_Value>
<Variable_Name>Secondary_Gradient_Color_B</Variable_Name>
<Color>Black_2</Color>
</Color_Value>
<Color_Value>
<Variable_Name>Secondary_Gradient_Color_C</Variable_Name>
<Color>Black_3</Color>
</Color_Value>
<Color_Value>
<Variable_Name>Secondary_Gradient_Color_D</Variable_Name>
<Color>Black_4</Color>
</Color_Value>
</Color_Values>
</Color_Scheme_Chance>
</Color_Scheme_Chances>
</Material_group>
<Material_group>
<Name>male eyebrows 2</Name>
<Color_Group>hair</Color_Group>
<Material_chances>
<Material_chance>
<Name>malebody_3</Name>
<Chance>100.000</Chance>
</Material_chance>
</Material_chances>
<Color_Scheme_Chances>
<Color_Scheme_Chance>
<Name>Unnamed</Name>
<Chance>100.000</Chance>
<Color_Values>
<Color_Value>
<Variable_Name>Primary_Gradient_Color_A</Variable_Name>
<Color>Black_1</Color>
</Color_Value>
<Color_Value>
<Variable_Name>Primary_Gradient_Color_B</Variable_Name>
<Color>Black_2</Color>
</Color_Value>
<Color_Value>
<Variable_Name>Primary_Gradient_Color_C</Variable_Name>
<Color>Black_3</Color>
</Color_Value>
<Color_Value>
<Variable_Name>Primary_Gradient_Color_D</Variable_Name>
<Color>Black_4</Color>
</Color_Value>
<Color_Value>
<Variable_Name>Specular_Color</Variable_Name>
<Color>Black_specular</Color>
</Color_Value>
<Color_Value>
<Variable_Name>Secondary_Gradient_Color_A</Variable_Name>
<Color>Black_1</Color>
</Color_Value>
<Color_Value>
<Variable_Name>Secondary_Gradient_Color_B</Variable_Name>
<Color>Black_2</Color>
</Color_Value>
<Color_Value>
<Variable_Name>Secondary_Gradient_Color_C</Variable_Name>
<Color>Black_3</Color>
</Color_Value>
<Color_Value>
<Variable_Name>Secondary_Gradient_Color_D</Variable_Name>
<Color>Black_4</Color>
</Color_Value>
</Color_Values>
</Color_Scheme_Chance>
</Color_Scheme_Chances>
</Material_group>
<Material_group>
<Name>goatee 17</Name>
<Color_Group>hair</Color_Group>
<Material_chances>
<Material_chance>
<Name>cmBea_mGoat17_4</Name>
<Chance>100.000</Chance>
</Material_chance>
</Material_chances>
<Color_Scheme_Chances>
<Color_Scheme_Chance>
<Name>Unnamed</Name>
<Chance>100.000</Chance>
<Color_Values>
<Color_Value>
<Variable_Name>Primary_Gradient_Color_A</Variable_Name>
<Color>Black_1</Color>
</Color_Value>
<Color_Value>
<Variable_Name>Primary_Gradient_Color_B</Variable_Name>
<Color>Black_2</Color>
</Color_Value>
<Color_Value>
<Variable_Name>Primary_Gradient_Color_C</Variable_Name>
<Color>Black_3</Color>
</Color_Value>
<Color_Value>
<Variable_Name>Primary_Gradient_Color_D</Variable_Name>
<Color>Black_4</Color>
</Color_Value>
<Color_Value>
<Variable_Name>Specular_Color</Variable_Name>
<Color>Black_specular</Color>
</Color_Value>
<Color_Value>
<Variable_Name>Secondary_Gradient_Color_A</Variable_Name>
<Color>Black_1</Color>
</Color_Value>
<Color_Value>
<Variable_Name>Secondary_Gradient_Color_B</Variable_Name>
<Color>Black_2</Color>
</Color_Value>
<Color_Value>
<Variable_Name>Secondary_Gradient_Color_C</Variable_Name>
<Color>Black_3</Color>
</Color_Value>
<Color_Value>
<Variable_Name>Secondary_Gradient_Color_D</Variable_Name>
<Color>Black_4</Color>
</Color_Value>
</Color_Values>
</Color_Scheme_Chance>
</Color_Scheme_Chances>
</Material_group>
<Material_group>
<Name>human eyes</Name>
<Material_chances>
<Material_chance>
<Name>brown_5</Name>
<Chance>100.000</Chance>
</Material_chance>
</Material_chances>
</Material_group>
<Material_group>
<Name>Terminator Shades</Name>
<Material_chances>
<Material_chance>
<Name>cmGla_uShades01_6</Name>
<Chance>100.000</Chance>
</Material_chance>
</Material_chances>
<Color_Scheme_Chances>
<Color_Scheme_Chance>
<Name>Unnamed</Name>
<Chance>100.000</Chance>
<Color_Values>
<Color_Value>
<Variable_Name>Diffuse_Color_R</Variable_Name>
<Color>Black</Color>
</Color_Value>
<Color_Value>
<Variable_Name>Diffuse_Color_G</Variable_Name>
<Color>Black</Color>
</Color_Value>
<Color_Value>
<Variable_Name>Diffuse_Color_B</Variable_Name>
<Color>Black</Color>
</Color_Value>
<Color_Value>
<Variable_Name>Decal_Map_2_Color</Variable_Name>
<Color>White</Color>
</Color_Value>
</Color_Values>
</Color_Scheme_Chance>
</Color_Scheme_Chances>
</Material_group>
<Material_group>
<Name>men's long loose cargo shorts 2</Name>
<Material_chances>
<Material_chance>
<Name>Plaid_7</Name>
<Chance>100.000</Chance>
</Material_chance>
</Material_chances>
<Color_Scheme_Chances>
<Color_Scheme_Chance>
<Name>Unnamed</Name>
<Chance>100.000</Chance>
<Color_Values>
<Color_Value>
<Variable_Name>Diffuse_Color_R</Variable_Name>
<Color>Black</Color>
</Color_Value>
<Color_Value>
<Variable_Name>Diffuse_Color_G</Variable_Name>
<Color>Black</Color>
</Color_Value>
<Color_Value>
<Variable_Name>Diffuse_Color_B</Variable_Name>
<Color>Black</Color>
</Color_Value>
<Color_Value>
<Variable_Name>Decal_Map_2_Color</Variable_Name>
<Color>White</Color>
</Color_Value>
</Color_Values>
</Color_Scheme_Chance>
</Color_Scheme_Chances>
</Material_group>
<Material_group>
<Name>basic T-shirt</Name>
<Material_chances>
<Material_chance>
<Name>clean_8</Name>
<Chance>100.000</Chance>
</Material_chance>
</Material_chances>
<Color_Scheme_Chances>
<Color_Scheme_Chance>
<Name>Unnamed</Name>
<Chance>100.000</Chance>
<Color_Values>
<Color_Value>
<Variable_Name>Diffuse_Color_R</Variable_Name>
<Color>Royal Blue</Color>
</Color_Value>
<Color_Value>
<Variable_Name>Diffuse_Color_G</Variable_Name>
<Color>Royal Blue</Color>
</Color_Value>
<Color_Value>
<Variable_Name>Diffuse_Color_B</Variable_Name>
<Color>Royal Blue</Color>
</Color_Value>
<Color_Value>
<Variable_Name>Decal_Map_2_Color</Variable_Name>
<Color>Dark Goldenrod</Color>
</Color_Value>
</Color_Values>
</Color_Scheme_Chance>
</Color_Scheme_Chances>
<Texture_Chances>
<Texture_Chance>
<Chance>100.000</Chance>
<Texture_Entries>
<Texture_Entry>
<Texture_Name>Decal_Map_2</Texture_Name>
<Texture_Filename>LOG_256x256_sqd01.tga</Texture_Filename>
</Texture_Entry>
</Texture_Entries>
</Texture_Chance>
</Texture_Chances>
</Material_group>
<Material_group>
<Name>double-strapped sandals</Name>
<Material_chances>
<Material_chance>
<Name>sandals 03_9</Name>
<Chance>100.000</Chance>
</Material_chance>
</Material_chances>
<Color_Scheme_Chances>
<Color_Scheme_Chance>
<Name>Unnamed</Name>
<Chance>100.000</Chance>
<Color_Values>
<Color_Value>
<Variable_Name>Diffuse_Color_R</Variable_Name>
<Color>Bistre</Color>
</Color_Value>
<Color_Value>
<Variable_Name>Diffuse_Color_G</Variable_Name>
<Color>Copper</Color>
</Color_Value>
<Color_Value>
<Variable_Name>Diffuse_Color_B</Variable_Name>
<Color>Medium Khaki</Color>
</Color_Value>
<Color_Value>
<Variable_Name>Decal_Map_2_Color</Variable_Name>
<Color>White</Color>
</Color_Value>
</Color_Values>
</Color_Scheme_Chance>
</Color_Scheme_Chances>
</Material_group>
<Material_group>
<Name>men's nice watch 1 left</Name>
<Material_chances>
<Material_chance>
<Name>watchband_10</Name>
<Chance>100.000</Chance>
</Material_chance>
</Material_chances>
<Color_Scheme_Chances>
<Color_Scheme_Chance>
<Name>Unnamed</Name>
<Chance>100.000</Chance>
<Color_Values>
<Color_Value>
<Variable_Name>Diffuse_Color_R</Variable_Name>
<Color>Metallic Gold</Color>
</Color_Value>
<Color_Value>
<Variable_Name>Diffuse_Color_G</Variable_Name>
<Color>Silver</Color>
</Color_Value>
<Color_Value>
<Variable_Name>Diffuse_Color_B</Variable_Name>
<Color>White</Color>
</Color_Value>
<Color_Value>
<Variable_Name>Decal_Map_2_Color</Variable_Name>
<Color>White</Color>
</Color_Value>
</Color_Values>
</Color_Scheme_Chance>
</Color_Scheme_Chances>
</Material_group>
</Materials>
<Morph_Sets>
<Morph_Set>
<Name>Alvan</Name>
<Weight>100.000</Weight>
</Morph_Set>
</Morph_Sets>
<Personas>
<Persona>
<Name>AM_FRAT</Name>
<Weight>100</Weight>
</Persona>
</Personas>
</Variant>
</Variants>
</Mesh>
</Table>
<TableTemplates>
</TableTemplates>
Code:
           <Vid_chances>
                                <Vid_chance>
                                    <Description>men's long loose cargo shorts 2</Description>
                                    <VID_list>10</VID_list>
                                    <Chance>100.000</Chance>
                                </Vid_chance>
                            </Vid_chances>
                        </Vid_group>
                        <Vid_group>
                            <Name>undershirt</Name>
                            <Vid_chances>
                                <Vid_chance>
                                    <Description>basic T-shirt</Description>
                                    <VID_list>12</VID_list>
                                    <Chance>100.000</Chance>
                                </Vid_chance>
                            </Vid_chances>
                        </Vid_group>
                        <Vid_group>
There are two sets of entries that you need to look at. The first set shows which clothes the
target is wearing. The second set is the one that you edit.
Code:
   <Material_group>
                            <Name>men's long loose cargo shorts 2</Name>
                            <Material_chances>
                                <Material_chance>
                                    <Name>Plaid_7</Name>
                                    <Chance>100.000</Chance>
                                </Material_chance>
                            </Material_chances>
                            <Color_Scheme_Chances>
                                <Color_Scheme_Chance>
                                    <Name>Unnamed</Name>
                                    <Chance>100.000</Chance>
                                    <Color_Values>
                                        <Color_Value>
                                            <Variable_Name>Diffuse_Color_R</Variable_Name>
                                            <Color>Black</Color>
                                        </Color_Value>
                                        <Color_Value>
                                            <Variable_Name>Diffuse_Color_G</Variable_Name>
                                            <Color>Black</Color>
                                        </Color_Value>
                                        <Color_Value>
                                            <Variable_Name>Diffuse_Color_B</Variable_Name>
                                            <Color>Black</Color>
                                        </Color_Value>
                                        <Color_Value>
                                            <Variable_Name>Decal_Map_2_Color</Variable_Name>
                                            <Color>White</Color>
                                        </Color_Value>
                                    </Color_Values>
                                </Color_Scheme_Chance>
                            </Color_Scheme_Chances>
                        </Material_group>
                        <Material_group>
                            <Name>basic T-shirt</Name>
                            <Material_chances>
                                <Material_chance>
                                    <Name>clean_8</Name>
                                    <Chance>100.000</Chance>
                                </Material_chance>
                            </Material_chances>
                            <Color_Scheme_Chances>
                                <Color_Scheme_Chance>
                                    <Name>Unnamed</Name>
                                    <Chance>100.000</Chance>
                                    <Color_Values>
                                        <Color_Value>
                                            <Variable_Name>Diffuse_Color_R</Variable_Name>
                                            <Color>Royal Blue</Color>
                                        </Color_Value>
                                        <Color_Value>
                                            <Variable_Name>Diffuse_Color_G</Variable_Name>
                                            <Color>Royal Blue</Color>
                                        </Color_Value>
                                        <Color_Value>
                                            <Variable_Name>Diffuse_Color_B</Variable_Name>
                                            <Color>Royal Blue</Color>
                                        </Color_Value>
Just change the color values then use the npc cruncher to crunch the edited file.
As part of -Seabound Saints-'s NPC Editing - A Comprehensive Guide there is a
zip file that will make the crunching easier. It is the NPC Cruncher Stuff Zip File.
Some characters spawn in or on vehicles for exmple Clint and Jeremiah.
But those vehicles can be changed or removed.
For instance Jeremiah rides a Kenshin in the original mission
Here is the original line of code for reference:
<Vehicle>bike_rocket02</Vehicle>
In order to show that the vehicle could be changed i I changed it
to the PeeWee
<Vehicle>bike_pocket01</Vehicle>

Clint drove a Compton originally. Now as my father used to say
"He rides Shank's Mare" (A colloquialism for walking.)
<Vehicle>car_4dr_lowrider01</Vehicle>
To remove his ride just delete the line.

You can also add vehicles to targets who don't have them such as Alvan
just add the vehicle line under the respect reward line.
Just to see if it would work I gave him a Helicopter. I did spawn but sadly
he wouldn't fly it.
<Vehicle>heli_4dr_police01</Vehicle>


Here is Clint In A Chopper
But those vehicles can be changed or removed.
For instance Jeremiah rides a Kenshin in the original mission
Here is the original line of code for reference:
<Vehicle>bike_rocket02</Vehicle>
In order to show that the vehicle could be changed i I changed it
to the PeeWee
<Vehicle>bike_pocket01</Vehicle>
Clint drove a Compton originally. Now as my father used to say
"He rides Shank's Mare" (A colloquialism for walking.)
<Vehicle>car_4dr_lowrider01</Vehicle>
To remove his ride just delete the line.
You can also add vehicles to targets who don't have them such as Alvan
just add the vehicle line under the respect reward line.
Just to see if it would work I gave him a Helicopter. I did spawn but sadly
he wouldn't fly it.
<Vehicle>heli_4dr_police01</Vehicle>
Code:
  <Name>Alvan</Name>
                <Character>npc_target01</Character>
                <Respect_Reward>200</Respect_Reward>
                <Cash_Reward>500</Cash_Reward>
               <Vehicle>heli_4dr_police01</Vehicle>
             ...
Here is Clint In A Chopper
Q: Why is it better to edit string files than to add text via the xtbl file?
A: Display Names in .xtbl files are intended to use Localization Strings. However, it is often possible to use non-localized text. (Text added via xtbl file.) Doing this eats into the game's memory allowance for non-localized text characters, and when this is exceeded, the game crashes. Localization Strings do not encroach on this memory limit, thus using them increases compatibility with both the game and other mods. - Courtesy Of -SeaboundSaint-'s Localization Strings All-In-One List (with a slight edit fot clarification)
String Files are located in the Patch.vpp_pc file
String Files are also located in the original_patch directory in the GOTR folder
The string files all have the le_string extension
There are three sets of strings
PlatformXX-le_strings
StaticXX.le_strings
VoiceXX.le_strings
The XX represent to two digit language code.
US - American English
DE - Deutsh
ES - Espanol
etc ...
Before you begin extracting files you need to have you patch directory (patch.vpp_pc) extracted somewhere
Place a copy of the file that you wish to extract in your tools folder.
A: Display Names in .xtbl files are intended to use Localization Strings. However, it is often possible to use non-localized text. (Text added via xtbl file.) Doing this eats into the game's memory allowance for non-localized text characters, and when this is exceeded, the game crashes. Localization Strings do not encroach on this memory limit, thus using them increases compatibility with both the game and other mods. - Courtesy Of -SeaboundSaint-'s Localization Strings All-In-One List (with a slight edit fot clarification)
What are Localization Strings?
A Localization String is a text string which when read by the game will fetch specified HUD/Menu messages, etc. in whichever language you are running the game in.
Why use them?
Display Names in .xtbl files are intended to use Localization Strings. However, it is often possible to use non-localized text. Doing this eats into the game's memory allowance for non-localized text characters, and when this is exceeded, the game crashes. Localization Strings do not encroach on this memory limit, thus using them increases compatibility with...
- -SeaboundSaint-
- language list localisation localization memory strings table text translate translation
- Replies: 0
- Forum: Saints Row 2


String Files are located in the Patch.vpp_pc file
String Files are also located in the original_patch directory in the GOTR folder
The string files all have the le_string extension
There are three sets of strings
PlatformXX-le_strings
StaticXX.le_strings
VoiceXX.le_strings
The XX represent to two digit language code.
US - American English
DE - Deutsh
ES - Espanol
etc ...
Before you begin extracting files you need to have you patch directory (patch.vpp_pc) extracted somewhere
Place a copy of the file that you wish to extract in your tools folder.
To extract a file use the following syntax, being sure to change your file
directories as neccessary.
c:\sTools\ThomasJepp.SaintsRow.ExtractStrings.exe -sr2 -xtbl="c:\Tools\strings" static_US.le_strings
c:\Tools is the directory that has Thomas.Jepp tools in it
ThomasJepp.SaintsRow.ExtractStrings.exe is the name of the extraction program.
-SR2 tells the program wich compression/decompression method to use.
-xtbl="c:\Toold\strings" is where I have the strings files located.
After the extractor has finished it's work then you will have a txt file called static_US.txt
Just search the text file for the strings that you wish to change.

These are the original strings for Alvan's Dossier

Here are some test strings with color coding
Here is the edited line in the strings file.
2768704460: "This is the first paragraph of text. \n\n[format][color:blue]This the second paragraph of text.[/format]"
First Put the start of your text in quotes then at the end of your line use \n
If you wish to start another paragraph use /n/n
The color code [format][color:blue]This the second paragraph of text.[/format] needs to wrap around the text amd finish inside
the quotation marks.
These are the original strings for Alvan's Dossier
Here are some test strings with color coding
Here is the edited line in the strings file.
2768704460: "This is the first paragraph of text. \n\n[format][color:blue]This the second paragraph of text.[/format]"
Blue
Bronze
Gold
Green
Orange
Purple
Red
Silver
Teal
Yellow
Bronze
Gold
Green
Orange
Purple
Red
Silver
Teal
Yellow
First Put the start of your text in quotes then at the end of your line use \n
If you wish to start another paragraph use /n/n
The color code [format][color:blue]This the second paragraph of text.[/format] needs to wrap around the text amd finish inside
the quotation marks.
c:\Tools\ThomasJepp.SaintsRow.BuildStrings.exe -sr2 static_us.txt
Change path as appropriate.
Change path as appropriate.
<Choice>With_Police</Choice>
<Choice>With_FBI</Choice>
<Choice>With_EMT</Choice>
<Choice>With_Firefighters</Choice>
<Choice>With_Hazmat</Choice>
<Choice>With_Taxi</Choice>
<Choice>With_Gyros_Delivery</Choice>
<Choice>With_FB_Delivery</Choice>
</Element>
Special Spawns are spans that have an extra requirement or an extra element
such as Anoop needing to arrive in a police car or Scott
needing to drive an O-Ring.
The list above explains what a special spawn needs to involve.
You can remove the special spawn line from targets.
For instance if you remove Anoops sepcial spawn (With_Police)
then he shows up alone on foot.
If you remove Scott's Special Spawn (FB_Delivery) then he shows up on foot.
However since you have to call Freckle Bitches to get him to spawn you still have
another driver show up in the O-Ring.
You can add special spawns to other targets but be careful when you do.
Some combinations may not work correctly.
Code:
<TableTemplates>
</TableTemplates>
<TableDescription>
<Name>Hitman</Name>
<Type>TableDescription</Type>
<Description>Description of the activity.</Description>
<Element>
<Name>Name</Name>
<Type>String</Type>
</Element>
<Element>
<Name>Start_Location</Name>
<Type>Reference</Type>
<Display_Name>Start Location</Display_Name>
<Description>The location for this Hitman instance's trigger.</Description>
<Reference>
<File>..\levels\SaintsRow2\districts\hitman_sr2_city_navpoints.xtbl</File>
<Type>Navpoint.Name</Type>
<OpenSeparate>False</OpenSeparate>
</Reference>
</Element>
<Element>
<Name>Display_Name</Name>
<Type>Reference</Type>
<Display_Name>Display Name</Display_Name>
<Description>The localization tag for the display name of this Hitman location.</Description>
<Reference>
<File>localized_exports\SR2_Diversion_text.xtbl</File>
<Type>SR2_Diversion_Identifier.Name</Type>
<OpenSeparate>False</OpenSeparate>
</Reference>
</Element>
<Element>
<Name>Location_Index</Name>
<Type>Int</Type>
<Display_Name>Location Index</Display_Name>
<Description>Used for the pause menu hud. Should start at '1'.</Description>
<Default>1</Default>
<MinValue>1</MinValue>
</Element>
<Element>
<Name>Unlockable</Name>
<Type>Reference</Type>
<Description>The unlockable for killing all targets in this Hitman location.</Description>
<Required>false</Required>
<Reference>
<File>unlockables.xtbl</File>
<Type>Unlockable.Name</Type>
<OpenSeparate>False</OpenSeparate>
</Reference>
</Element>
<Element>
<Name>Force_Spawn_Delay</Name>
<Type>Int</Type>
<Display_Name>Force Spawn Delay (seconds)</Display_Name>
<Description>The delay value for spawning all targets in that have a valid location in the position of the player without having to worry obout conditions, flags or triggers.</Description>
<Required>false</Required>
<Default>0</Default>
<MinValue>0</MinValue>
</Element>
<Element>
<Name>Unlock_Conversation_ID</Name>
<Type>String</Type>
<Display_Name>Unlock Conversation ID</Display_Name>
<Required>false</Required>
</Element>
<Element>
<Name>Targets</Name>
<Type>List</Type>
<Element>
<Name>Target</Name>
<Type>Element</Type>
<Element>
<Name>Name</Name>
<Type>String</Type>
<Description>The Hitman target's name</Description>
</Element>
<Element>
<Name>Dossier</Name>
<Type>Reference</Type>
<Description>Localization tag for the description on how to find this target.</Description>
<Required>false</Required>
<Reference>
<File>localized_exports\SR2_Diversion_text.xtbl</File>
<Type>SR2_Diversion_Identifier.Name</Type>
<OpenSeparate>False</OpenSeparate>
</Reference>
</Element>
<Element>
<Name>Specific_Location</Name>
<Type>Reference</Type>
<Display_Name>Specific Location</Display_Name>
<Reference>
<File>localized_exports\SR2_Diversion_text.xtbl</File>
<Type>SR2_Diversion_Identifier.Name</Type>
<OpenSeparate>False</OpenSeparate>
</Reference>
</Element>
<Element>
<Name>Character</Name>
<Type>Reference</Type>
<Description>The character info for this target. This field will be ignored for targets who spawn with the police or FBI.</Description>
<Reference>
<File>character.xtbl</File>
<Type>Character.Name</Type>
<OpenSeparate>False</OpenSeparate>
</Reference>
</Element>
<Element>
<Name>Character_Variant</Name>
<Type>String</Type>
<Display_Name>Character Variant</Display_Name>
<Description>The target's character variant. This is pretty much required for police and FBI spawns.</Description>
<Required>false</Required>
</Element>
<Element>
<Name>Weapon</Name>
<Type>Reference</Type>
<Description>The weapon this target should carry.</Description>
<Required>false</Required>
<Reference>
<File>weapons.xtbl</File>
<Type>Weapon.Name</Type>
<OpenSeparate>False</OpenSeparate>
</Reference>
</Element>
<Element>
<Name>Vehicle</Name>
<Type>Reference</Type>
<Description>The vehicle this target should spawn on. This is only used in very specific occasions.</Description>
<Required>false</Required>
<Reference>
<File>vehicles.xtbl</File>
<Type>Vehicle.Name</Type>
<OpenSeparate>False</OpenSeparate>
</Reference>
</Element>
<Element>
<Name>HP</Name>
<Type>Int</Type>
<Description>The HP that this target will have.</Description>
<Default>100</Default>
<MinValue>0</MinValue>
</Element>
<Element>
<Name>Cash_Reward</Name>
<Type>Int</Type>
<Display_Name>Cash Reward</Display_Name>
<Description>Cash reward for killing this hitman target.</Description>
<Default>0</Default>
</Element>
<Element>
<Name>Respect_Reward</Name>
<Type>Int</Type>
<Display_Name>Respect Reward</Display_Name>
<Description>The respect that the player will earn from killing this target.</Description>
<Default>0</Default>
<MinValue>0</MinValue>
</Element>
<Element>
<Name>Special_Spawns</Name>
<Type>Selection</Type>
<Display_Name>Special Spawns</Display_Name>
<Description>Special target spawns. These indicate special behaviors for hitman targets. These targets do not need action nodes.</Description>
<Required>false</Required>
<Choice>With_Police</Choice>
<Choice>With_FBI</Choice>
<Choice>With_EMT</Choice>
<Choice>With_Firefighters</Choice>
<Choice>With_Hazmat</Choice>
<Choice>With_Taxi</Choice>
<Choice>With_Gyros_Delivery</Choice>
<Choice>With_FB_Delivery</Choice>
</Element>
<Element>
<Name>Decoy_Chance</Name>
<Type>Float</Type>
<Display_Name>Decoy Chance</Display_Name>
<Default>0.0</Default>
<MinValue>0</MinValue>
<MaxValue>1</MaxValue>
</Element>
<Element>
<Name>Rival_Hitman_Chance</Name>
<Type>Float</Type>
<Display_Name>Rival Hitman Chance</Display_Name>
<Default>0.0</Default>
<MinValue>0</MinValue>
<MaxValue>1</MaxValue>
</Element>
<Element>
<Name>Bodyguards</Name>
<Type>Grid</Type>
<Required>false</Required>
<Element>
<Name>Bodyguard</Name>
<Type>Element</Type>
<Element>
<Name>Character</Name>
<Type>Reference</Type>
<Reference>
<File>character_presets.xtbl</File>
<Type>Preset.Name</Type>
<OpenSeparate>False</OpenSeparate>
</Reference>
</Element>
<Element>
<Name>Weapon</Name>
<Type>Reference</Type>
<Required>false</Required>
<Reference>
<File>weapons.xtbl</File>
<Type>Weapon.Name</Type>
<OpenSeparate>False</OpenSeparate>
</Reference>
</Element>
</Element>
<Num_Display_Rows>3</Num_Display_Rows>
</Element>
<Element>
<Name>Usable_Action_Node_NPC_Types</Name>
<Type>Grid</Type>
<Display_Name>Usable Action Node NPC Types</Display_Name>
<Description>This list specifies all action nodes that this target is allowed to use. Once spawned, the target will navigate to the closest action node of one of these types if one is within range.</Description>
<Required>false</Required>
<Element>
<Name>Action_Node_NPC_Type_Element</Name>
<Type>Element</Type>
<Display_Name>Action Node NPC Type_Element</Display_Name>
<Element>
<Name>Type</Name>
<Type>Reference</Type>
<Reference>
<File>action_node_npcs.xtbl</File>
<Type>Action_node_npc.Name</Type>
<OpenSeparate>False</OpenSeparate>
</Reference>
</Element>
</Element>
<Min_Children>1</Min_Children>
<Num_Display_Rows>8</Num_Display_Rows>
</Element>
<Element>
<Name>Spawn_Locations</Name>
<Type>List</Type>
<Display_Name>Spawn Locations</Display_Name>
<Description>This is a list of locations where this hitman target will spawn. Whenever the player leaves one of these locations, the target's temp. spawn triggers will reset.</Description>
<Required>false</Required>
<Element>
<Name>Location</Name>
<Type>ComboElement</Type>
<Element>
<Name>District</Name>
<Type>Reference</Type>
<Required>false</Required>
<Reference>
<File>districts.xtbl</File>
<Type>District.Name</Type>
<OpenSeparate>False</OpenSeparate>
</Reference>
</Element>
<Element>
<Name>Hood</Name>
<Type>Reference</Type>
<Required>false</Required>
<Reference>
<File>neighborhoods.xtbl</File>
<Type>Neighborhood.Name</Type>
<OpenSeparate>False</OpenSeparate>
</Reference>
</Element>
<Element>
<Name>Interior</Name>
<Type>Reference</Type>
<Required>false</Required>
<Reference>
<File>..\levels\saintsrow2\districts\shops_sr2_city_interiors.xtbl</File>
<Type>Interior.Name</Type>
<OpenSeparate>False</OpenSeparate>
</Reference>
</Element>
<Element>
<Name>Defined_Region</Name>
<Type>Reference</Type>
<Display_Name>Defined Region</Display_Name>
<Required>false</Required>
<Reference>
<File>..\levels\saintsrow2\districts\hitman_sr2_city.xtbl</File>
<Type>Hitman.Defined_Regions.Defined_Region.Name</Type>
<OpenSeparate>False</OpenSeparate>
</Reference>
</Element>
</Element>
<Num_Display_Rows>8</Num_Display_Rows>
</Element>
<Element>
<Name>Spawn_Conditions</Name>
<Type>List</Type>
<Display_Name>Spawn Conditions</Display_Name>
<Description>ALL conditions must be met
at once for target to spawn.</Description>
<Required>false</Required>
<Element>
<Name>Condition</Name>
<Type>ComboElement</Type>
<Element>
<Name>Wearing_Customization_Item</Name>
<Type>Reference</Type>
<Display_Name>Wearing Customization Item</Display_Name>
<Required>false</Required>
<Reference>
<File>customization_items.xtbl</File>
<Type>Customization_Item.Name</Type>
<OpenSeparate>False</OpenSeparate>
</Reference>
</Element>
<Element>
<Name>On_Motorcycle</Name>
<Type>Element</Type>
<Display_Name>On Motorcycle</Display_Name>
<Required>false</Required>
</Element>
<Element>
<Name>Time_Of_Day</Name>
<Type>Element</Type>
<Required>false</Required>
<Element>
<Name>Start</Name>
<Type>Int</Type>
<Default>0</Default>
</Element>
<Element>
<Name>End</Name>
<Type>Int</Type>
<Default>0</Default>
</Element>
</Element>
</Element>
<Num_Display_Rows>8</Num_Display_Rows>
</Element>
<Element>
<Name>Permanent_Spawn_Flags</Name>
<Type>List</Type>
<Display_Name>Permanent Spawn Flags</Display_Name>
<Description>ALL flags must be met
at once for target to spawn.</Description>
<Required>false</Required>
<Element>
<Name>Flag</Name>
<Type>ComboElement</Type>
<Element>
<Name>Played_Race_Location</Name>
<Type>Reference</Type>
<Display_Name>Played Race Location</Display_Name>
<Required>false</Required>
<Reference>
<File>..\levels\saintsrow2\activities\racing_sr2_city.xtbl</File>
<Type>Racing.Name</Type>
<OpenSeparate>False</OpenSeparate>
</Reference>
</Element>
<Element>
<Name>Tagged_Spot_In_District</Name>
<Type>Reference</Type>
<Display_Name>Tagged Spot In District</Display_Name>
<Required>false</Required>
<Reference>
<File>districts.xtbl</File>
<Type>District.Name</Type>
<OpenSeparate>False</OpenSeparate>
</Reference>
</Element>
<Element>
<Name>Purchased_Track</Name>
<Type>Element</Type>
<Display_Name>Purchased Track</Display_Name>
<Description>Number of different song tracks that must have been purchased. (Any store).</Description>
<Required>false</Required>
<Default>1</Default>
</Element>
<Element>
<Name>Purchased_Food_From_FB</Name>
<Type>Reference</Type>
<Display_Name>Purchased Food From FB</Display_Name>
<Required>false</Required>
<Reference>
<File>drugs.xtbl</File>
<Type>Drug.Name</Type>
<OpenSeparate>False</OpenSeparate>
</Reference>
</Element>
<Element>
<Name>Purchased_Watercraft</Name>
<Type>Element</Type>
<Display_Name>Purchased Watercraft</Display_Name>
<Required>false</Required>
</Element>
<Element>
<Name>Purchased_Tattoo</Name>
<Type>Element</Type>
<Display_Name>Purchased Tattoo</Display_Name>
<Description>Buy a tattoo</Description>
<Required>false</Required>
</Element>
<Element>
<Name>Revived_After_Dying</Name>
<Type>Element</Type>
<Display_Name>Revived After Dying</Display_Name>
<Required>false</Required>
</Element>
<Element>
<Name>Played_Hoing_Diversion</Name>
<Type>Element</Type>
<Display_Name>Played Hoing Diversion</Display_Name>
<Required>false</Required>
</Element>
</Element>
<Num_Display_Rows>8</Num_Display_Rows>
</Element>
<Element>
<Name>Temporary_Spawn_Triggers</Name>
<Type>List</Type>
<Display_Name>Temporary Spawn Triggers</Display_Name>
<Description>Triggers are reset whenever the player leaves one of the target's regions.</Description>
<Required>false</Required>
<Element>
<Name>Trigger</Name>
<Type>ComboElement</Type>
<Element>
<Name>Use_Drink</Name>
<Type>Element</Type>
<Display_Name>Use Drink</Display_Name>
<Required>false</Required>
</Element>
<Element>
<Name>Use_Drug</Name>
<Type>Element</Type>
<Display_Name>Use Drug</Display_Name>
<Required>false</Required>
<Default>0</Default>
</Element>
<Element>
<Name>Start_Fight</Name>
<Type>Element</Type>
<Display_Name>Start Fight</Display_Name>
<Required>false</Required>
</Element>
<Element>
<Name>Kill_Character</Name>
<Type>Reference</Type>
<Display_Name>Kill Character</Display_Name>
<Required>false</Required>
<Reference>
<File>character.xtbl</File>
<Type>Character.Name</Type>
<OpenSeparate>False</OpenSeparate>
</Reference>
</Element>
<Element>
<Name>Play_Casino_Machine</Name>
<Type>Element</Type>
<Display_Name>Play Casino Machine</Display_Name>
<Required>false</Required>
</Element>
<Element>
<Name>Time_In_Region</Name>
<Type>Element</Type>
<Display_Name>Time In Region</Display_Name>
<Description>Player must spend some amount of time or at least enter a defined region.</Description>
<Required>false</Required>
<Element>
<Name>Name</Name>
<Type>Reference</Type>
<Reference>
<File>..\levels\saintsrow2\districts\hitman_sr2_city.xtbl</File>
<Type>Hitman.Defined_Regions.Defined_Region.Name</Type>
<OpenSeparate>False</OpenSeparate>
</Reference>
</Element>
<Element>
<Name>Time</Name>
<Type>Int</Type>
<Display_Name>Time (sec)</Display_Name>
<Default>0</Default>
<MinValue>0</MinValue>
</Element>
</Element>
</Element>
<Num_Display_Rows>8</Num_Display_Rows>
</Element>
</Element>
<Num_Display_Rows>8</Num_Display_Rows>
</Element>
<Element>
<Name>Defined_Regions</Name>
<Type>Grid</Type>
<Display_Name>Defined Regions</Display_Name>
<Description>These defined regions are used for when none of the other location types (district, hood, interior) can satisfy the restrictions of the desired location. This is for situations such as being on a dance floor.</Description>
<Required>false</Required>
<Element>
<Name>Defined_Region</Name>
<Type>Element</Type>
<Display_Name>Defined Region</Display_Name>
<Element>
<Name>Name</Name>
<Type>String</Type>
<Description>The unique name of the defined region.</Description>
<Unique>true</Unique>
</Element>
<Element>
<Name>Center_Point</Name>
<Type>Reference</Type>
<Display_Name>Center Point</Display_Name>
<Description>Any point within the region. Preferably near the center.</Description>
<Reference>
<File>..\levels\SaintsRow2\districts\hitman_sr2_city_navpoints.xtbl</File>
<Type>Navpoint.Name</Type>
<OpenSeparate>False</OpenSeparate>
</Reference>
</Element>
<Element>
<Name>Boundary_Points</Name>
<Type>Grid</Type>
<Display_Name>Boundary Points</Display_Name>
<Description>The boundary points that define the region.</Description>
<Element>
<Name>Boundary_Point</Name>
<Type>Element</Type>
<Display_Name>Boundary Point</Display_Name>
<Element>
<Name>Name</Name>
<Type>Reference</Type>
<Reference>
<File>..\levels\SaintsRow2\districts\hitman_sr2_city_navpoints.xtbl</File>
<Type>Navpoint.Name</Type>
<OpenSeparate>False</OpenSeparate>
</Reference>
</Element>
</Element>
<Min_Children>3</Min_Children>
<Num_Display_Rows>8</Num_Display_Rows>
</Element>
</Element>
<Num_Display_Rows>8</Num_Display_Rows>
</Element>
</TableDescription>
<EntryCategories>
<Category>
<Name>Entries</Name>
</Category>
</EntryCategories>
</root>This file is located in common.vpp_pc and contains the unlock levels
for the hitman rewards
for the hitman rewards
Code:
<root>
<Table>
    <Hitman>
        <Name>Hitman</Name>
        <_Editor>
            <Category>Entries</Category>
            </_Editor>
        <Hitman_Unlockables>
            <Unlockable>
                <Num_Lists>1</Num_Lists>
                <Unlockable>Diversion_Hitman_1</Unlockable>
                </Unlockable>
            <Unlockable>
                <Num_Lists>3</Num_Lists>
                <Unlockable>Diversion_Hitman_3</Unlockable>
                </Unlockable>
            <Unlockable>
                <Num_Lists>5</Num_Lists>
                <Unlockable>Diversion_Hitman_ALL</Unlockable>
                </Unlockable>
            </Hitman_Unlockables>
        </Hitman>
    </Table>

<TableTemplates>
    </TableTemplates>

<TableDescription>
    <Name>Hitman</Name>
    <Type>TableDescription</Type>
    <Element>
        <Name>Name</Name>
        <Type>String</Type>
        </Element>
    <Element>
        <Name>Hitman_Unlockables</Name>
        <Type>Grid</Type>
        <Display_Name>Hitman Unlockables</Display_Name>
        <Element>
            <Name>Unlockable</Name>
            <Type>Element</Type>
            <Element>
                <Name>Num_Lists</Name>
                <Type>Int</Type>
                <Display_Name>Lists Completed</Display_Name>
                <Default>0</Default>
                </Element>
            <Element>
                <Name>Unlockable</Name>
                <Type>Reference</Type>
                <Required>false</Required>
                <Reference>
                    <File>unlockables.xtbl</File>
                    <Type>Unlockable.Name</Type>
                    <OpenSeparate>False</OpenSeparate>
                    </Reference>
                </Element>
            </Element>
        <Num_Display_Rows>8</Num_Display_Rows>
        </Element>
    </TableDescription>

<EntryCategories>
    <Category>
        <Name>Entries</Name>
        </Category>
    </EntryCategories>
</root>Masamaru's Pegtool:
-Seabound Saint-'s NPC Editing - A Comprehensive Guide
(grab The NPC Vruncher Stuff Zip File From This Post)
Minimaul's Tools (For String Builder And Extractor):
I made a new texture tool because there was a bug in old PegTool.
Have also been added several new features.
Please see the user's manual for more information.
FileName: SR2PegTool_v128.zip
FileSize: 1.23 MB (1,299,734 bytes)
ModifiedDate: 2020-11-21T20:33:19+09:00
MD5: 91cba71cfd96fe3ef426a452dcc37918
SHA1: 2fa4846e8e360cbf0a806dfad1e8d63c8f52edaf
--- what's new in this version ---
Version 1.28
Changed to check the automatic detection of transparent tgn texture by the file name
instead of checking the contents of the image. This is to prevent black and white
transparent textures from...
- Masamaru
- Replies: 73
- Forum: Saints Row 2
-Seabound Saint-'s NPC Editing - A Comprehensive Guide
(grab The NPC Vruncher Stuff Zip File From This Post)
Current Version: 1.0.1
With this guide, you will learn all about Saints Row 2's NPC files.
You will learn how to change the colours of the items an NPC wears, change their gameplay voice, filter in-game appearance by gender/race/character type, force specific outfit variants, change a character's model, change a character's animation set, set which gang the character belongs to, change spawning conditions, change a character's height and height variability, fix a prop to a character's left hand, and much more!
Version 1.0.0 of this guide is...
- -SeaboundSaint-
- character customization file files guide npc table tutorial xtbl
- Replies: 64
- Forum: Saints Row 2
Minimaul's Tools (For String Builder And Extractor):
There is an ongoing issue with CustomizationItemClone in versions newer than Rev121 - for many items it will fail to clone. If you need CustomizationItemClone, continue to use Rev 121 for now: https://minimaul.saintsrowmods.com/files/tools/releases/ThomasJepp.SaintsRow-rev121.zip or try the attached tweak to rev 133: CustomizationItemClone-rev133-with-reverts.7z
This toolset is made up of several tools:
Packfile tools
This toolset is made up of several tools:
Packfile tools
- ThomasJepp.SaintsRow.BuildPackfile.exe: A command line packfile builder that can optionally update asm_pc files when building str2_pc...
- Minimaul
- Replies: 415
- Forum: Saints Row IV / Re-Elected
I am including the files for the rewritten first activity instance for you to study. If you decide to try it out:
Just go to the Barrio activity location. The judge will be the first name on the list. (The Hitman Judge Mission Zip File)
Attachments
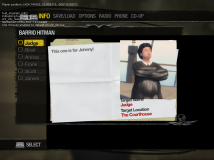
Last edited: