Admixon
Moderator
Heyoo.
This is my first guide/tutorial here so I'm sorry for any mistakes but I hope you'll understand it
With this tutorial you will be able to change almost every texture in the game like: city, makeup, clothing, skin,... textures
Let's begin!
Required Tools
- Minimaul's Saints Row 2, Saints Row: The Third, Saints Row IV and Gat Out Of Hell tools
- SR3 Texture Utilities
- Flow754's Peg Assembler
- Saints Row IV - Workshop upload tool (it's available on Steam)
- Any graphics editor that can open .dds files (Paint.NET, Photoshop, GIMP,...). In this tutorial I'm going to use Paint.NET.
I Unpacking vpp_pc files
1. Go to common\Saints Row IV\packfiles\pc\cache (it's the location of all vpp_pc files)

2. I recommend unpacking all of them. To do that you need Minimaul's tools. Open a new window (don't close the one with vpp_pc files), navigate to folder with the tools and simply drag and drop any vpp_pc file to ThomasJepp.SaintsRow.ExtractPackfile.exe

After extracting a new folder should appear in your pc\cache folder

In this tutorial I'm gonna replace one of the face mask texture but the process of saving and uploading looks the same for any other texture file.

II Unpacking str2_pc files
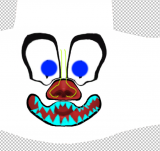
1. Find the file you want to edit. Let's edit face_makeup_clown so the file is face_makeup_clown.str2_pc
2. To extract it simply drag and drop to ThomasJepp.SaintsRow.ExtractPackfile.exe and a folder called extracted-face_makeup_clown.str2_pc will appear.
III Unpacking and editing texture file
1. Move the extracted-face_makeup_clown.str2_pc folder to a different location (you don't have to keep extracted vpp and str2 files in the cache folder)
2. Open the extracted-face_makeup_clown.str2_pc folder and open another window and head to SR3 Texture Utilities folder.
3. Drag and drop the .cvbm_pc (only that one!) file to SR3UnpackTextures.exe. The file format can be different like cvbm, cpeg but always drag and drop files that start with "c" and don't remove "g" files because they contain all the data!
makeup_face_clown01.tga file will appear in the same folder.
4. Open the texture file (I will use Paint.NET) and edit it


5. If it's done you're ready to save the texture
IV Saving the texture
Before saving, check what the texture size was before editing. It's very important. In this case it's 1MB
1. Press File > Save As

2. Double click the texture file in the next window to overwrite it.

This part is very important!
3. In the Save Configuration window you must select correct options to match the original file size.

Choose BC1 or BC3

and select or deselect

In this case the settings look like this:

4. Save it
V Packing
1. Open Flow754's Peg Assembler (pegAssembler_byFlow754.exe)
2. Drag and drop your edited texture file (if you edited more than one you can drop more files)

3. In the Name type: always_loaded
Output URL is a location where you save your file so copy an url of any folder where you want to save your files at. It can even be the extracted-face_makeup_clown.str2_pc folder, so it should look like this:

And press Create
4. When it's done 2 new files will appear in your output folder

5. Open Saints Row IV - Workshop upload tool
6. Drag and drop always_loaded files

7. Press File > Save > To file... (I recommend testing your mods before uploading them to workshop so save to file is the best option)

and save it in mods folder common\Saints Row IV\mods and name it whatever you like

VI Testing the mod
1. Launch the game
2. Go to Image as Designed and select Makeup > Entire Face > Can't Sleep

Credits
...later, I'm so tired writing the guide... give me some time to rest.
This is my first guide/tutorial here so I'm sorry for any mistakes but I hope you'll understand it

With this tutorial you will be able to change almost every texture in the game like: city, makeup, clothing, skin,... textures
Let's begin!
Required Tools
- Minimaul's Saints Row 2, Saints Row: The Third, Saints Row IV and Gat Out Of Hell tools
- SR3 Texture Utilities
- Flow754's Peg Assembler
- Saints Row IV - Workshop upload tool (it's available on Steam)
- Any graphics editor that can open .dds files (Paint.NET, Photoshop, GIMP,...). In this tutorial I'm going to use Paint.NET.
I Unpacking vpp_pc files
1. Go to common\Saints Row IV\packfiles\pc\cache (it's the location of all vpp_pc files)
2. I recommend unpacking all of them. To do that you need Minimaul's tools. Open a new window (don't close the one with vpp_pc files), navigate to folder with the tools and simply drag and drop any vpp_pc file to ThomasJepp.SaintsRow.ExtractPackfile.exe
After extracting a new folder should appear in your pc\cache folder
In this tutorial I'm gonna replace one of the face mask texture but the process of saving and uploading looks the same for any other texture file.

II Unpacking str2_pc files
1. Find the file you want to edit. Let's edit face_makeup_clown so the file is face_makeup_clown.str2_pc
2. To extract it simply drag and drop to ThomasJepp.SaintsRow.ExtractPackfile.exe and a folder called extracted-face_makeup_clown.str2_pc will appear.
III Unpacking and editing texture file
1. Move the extracted-face_makeup_clown.str2_pc folder to a different location (you don't have to keep extracted vpp and str2 files in the cache folder)
2. Open the extracted-face_makeup_clown.str2_pc folder and open another window and head to SR3 Texture Utilities folder.
3. Drag and drop the .cvbm_pc (only that one!) file to SR3UnpackTextures.exe. The file format can be different like cvbm, cpeg but always drag and drop files that start with "c" and don't remove "g" files because they contain all the data!
makeup_face_clown01.tga file will appear in the same folder.
4. Open the texture file (I will use Paint.NET) and edit it


5. If it's done you're ready to save the texture
IV Saving the texture
Before saving, check what the texture size was before editing. It's very important. In this case it's 1MB
1. Press File > Save As
2. Double click the texture file in the next window to overwrite it.
This part is very important!
3. In the Save Configuration window you must select correct options to match the original file size.
Choose BC1 or BC3
and select or deselect
In this case the settings look like this:
4. Save it
V Packing
1. Open Flow754's Peg Assembler (pegAssembler_byFlow754.exe)
2. Drag and drop your edited texture file (if you edited more than one you can drop more files)
3. In the Name type: always_loaded
Output URL is a location where you save your file so copy an url of any folder where you want to save your files at. It can even be the extracted-face_makeup_clown.str2_pc folder, so it should look like this:
And press Create
4. When it's done 2 new files will appear in your output folder
5. Open Saints Row IV - Workshop upload tool
6. Drag and drop always_loaded files
7. Press File > Save > To file... (I recommend testing your mods before uploading them to workshop so save to file is the best option)
and save it in mods folder common\Saints Row IV\mods and name it whatever you like
VI Testing the mod
1. Launch the game
2. Go to Image as Designed and select Makeup > Entire Face > Can't Sleep
Credits
...later, I'm so tired writing the guide... give me some time to rest.
Last edited by a moderator:

